


Materials needed
-Rocks/stones of varying shapes and sizes.
-Paint (or whichever medium you choose to decorate your rocks)
-Paint brush (or whichever tool you will need to apply the chosen medium)

Step 3: Once you have thought of your ideas for the stones it is now time to bring your ideas to life!
Nicola is using paint and markers to create her stones. Once you paint the designs on your stones allow them time to dry before playing with your new fabulous creations!

The Final Product
Now that the story stones are dry the fun begins. Enjoy creating and telling stories with the awesome stones you have made!
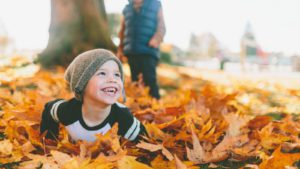
#Active Play: Autumn Leaf Fun
Fall is almost upon us! As the air turns colder and the leaves drop, here are some fun activities to get little bodies moving.

#Literacytip: Library Cards for Kids
Did you know that children of any age can have their very own library card with the TNRL. What better way to encourage young children to take charge of their reading than to give them the tools?

Summer Craftivity: Coffee Filter Butterfly
This week we are finishing off our summer craftivity series with a coffee filter butterfly. This super simple craft is an awesome way to end the summer!